You are not logged in.
- Topics: Active | Unanswered
#226 Re: Other Issues » [SOLVED] Need to reset root password » 2021-11-29 21:33:17
Now bind the directories
You are right, but the mistake was below, at the end of the post:
To end with, exit the chrooted system and unmount all the partitions:
Fixed it. Thanks ![]()
#227 Re: Other Issues » [SOLVED] Need to reset root password » 2021-11-29 21:26:51
golinux wrote:There is a way to do it from the boot screen by editing the kernel line. bluesdog has a howto over on the debian forum that I have used but it may be outdated by now. I would copy some notes that I have here but don't trust their accuracy because I haven't had to do it in years . . .
Yes, that's what I tried.
The linux line has to be appended withinit=/bin/bashI don't have n and b !
In a live system you can copy and paste them from anywhere.
#228 Re: Other Issues » [SOLVED] Need to reset root password » 2021-11-29 21:05:48
Run a live system and find out the device /dev/sdXY where the root partition (/) of your devuan installation is on. XY are the drive letter and the partition number. If you are not sure which it is, you can run lsblk -o name,mountpoint for that. In my case:
NAME   MOUNTPOINT
sda
|-sda1 /
|-sda2
|-sda5 /home
`-sda6 [SWAP]
Mount the partition as root (the root filesystem is usually a ext4 partition):
# mount -t ext4 /dev/sda1 /mntNow bind the directories:
# mount -o bind /sys /mnt/sys
# mount -t proc proc /mnt/proc
# mount -o bind /dev /mnt/dev
# mount -o bind /dev/pts /mnt/dev/pts
If you are going to change only root's password, this step is superfluous, but some other tasks might require it. For example, if you want to restore the grub, the above binding will provide access to detect other operating systems.
Chroot the partition:
# chroot /mntAt this point you can give a new password for root (for example, babylon ![]() ):
):
# passwd
New password:
Retype new password:
passwd: password updated successfully
To end with, exit the chrooted system and unmount all the directories:
# exit
# umount /mnt/dev/pts
# umount /mnt/dev
# umount /mnt/proc
# umount /mnt/sys
# umount /mnt
You have just changed root's password.
#229 Re: Hardware & System Configuration » How to properly install and use Zram » 2021-06-03 18:31:49
And then I have to figure out how to take screenshots during the installation. The simplest is probably an iPhone, but I don't have one
Debian-installer in graphical mode gives you the option to take screenshots during the installation.
#230 Re: Other Issues » [SOLVED] touchpad disabled » 2021-06-03 18:04:01
Are you using a particular desktop environment or window manager?. There are a couple of threads in the mailing list dedicated to how to enable/disable the touchpad:
https://lists.dyne.org/lurker/search/20 … ad.es.html
Indeed, Steve Litt shared a script for that:
https://lists.dyne.org/lurker/message/2 … 20.es.html
This could help you.
#231 Re: Other Issues » Tape drives » 2021-05-22 11:57:25
^ that is what i was thinking needed to happen when i looked at the mt-gnu manpage, i have hadnt much to do with mknod, i suppose it is similiar to makedev.
Are you sure it's a scsi | tape device? Have a look at the device/type file in the same path to the filesystem [1] you are taking the MAJOR:MINOR numbers from. If i'm not mistaken, the different options are (taken from the code of vdev [2]):
0 : DISK
1 : TAPE
4 : OPTICAL
5 : CD
7 : OPTICAL
0xe : DISK
0xf : OPTICAL
[1] For example, something looking like this:
/sys/devices/pci0000:00/0000:00:08.1/0000:04:00.3/usb1/1-3/1-3:1.0/host0/target0:0:0/0:0:0:0/block/sdc/device/type
[2] lines nº1145 - 1168 in vdevd/helpers/LINUX/stat_scsi.c:
https://github.com/jcnelson/vdev/blob/m … tat_scsi.c
#232 Re: Other Issues » Tape drives » 2021-05-22 08:29:46
you mean just do
sudo ln /dev/sdc /dev/tape?
sudo mt-gnu status
mt-gnu: /dev/tape is not a character special file
Did you try exporting the TAPE variable:
export TAPE=/dev/stXmt-gnu might use the value of this variable as the default device, so that you'll be able to by-pass the /dev/tape symlink.
Ralph is right, tape devices should be named /dev/stX.
#233 Re: Other Issues » Tape drives » 2021-05-15 22:17:20
as i said earlier, mt-gnu expects a character special file or a remote tape drive
can i create that file with mknod or something?
i triedmknod tape c 8 32where 8 and 32 are MAJ and MIN from /dev/sdc
but no success
Try with the b flag instead of c, for block-oriented devices:
mknod /dev/{filename} b MAJOR MINOR
#234 Re: Devuan Derivatives » SDK or (Debian) Live-build » 2021-05-04 21:24:36
That kinda got me wondering:
1. Should we use the SDK
or
2. Can we use the live-build tools with Devuan?
Both will work. I haven't used live-build since Daniel Baumman abandoned the project; but, besides that, there was another major reason with the arising of the SDK, which I am familiar with. This said, i do not think i'll be helpful if it comes to configuring your live-build, but i'll try to do my best in the case of the SDK. Gnuinos aside, Heads is another distribution built with this toolkit, and parazyd one of its main contributors.
On the other hand, i'm developing a gui environment for the SDK. By this i mean that interesting things are yet to come. I've just started it, so it consists of a simple customized terminal emulator with scrollbars and a copy&paste popup menu so far:
https://www.gnuinos.org/screenshots/ter … ulator.png
The name appearing in the tittle of the window is cTerm, but it's chosen at random.
Any suggestions?
#235 Re: Devuan » Can I create my fork of Devuan Beowulf and Devuan Beofulf repos? » 2021-04-19 22:35:04
Hello! Can I create my fork of Devuan Beowulf and Devuan Beofulf repositories?
What's devuan beofulf? Is it a new derivative unknown for me? Either way, the answer is yes, you can create a fork of these repositories in the same way than devuan forks the repository of debian. Indeed, that's what amprolla is for. Take as an example gnuinos, whose repository is a fully amprolla setup taking devuan as a base.
(main and contrib)?
Yes, you can configure the sections in lib/config.py
#236 Re: Other Issues » How to get rid of Swap file during installation... » 2021-04-17 00:58:35
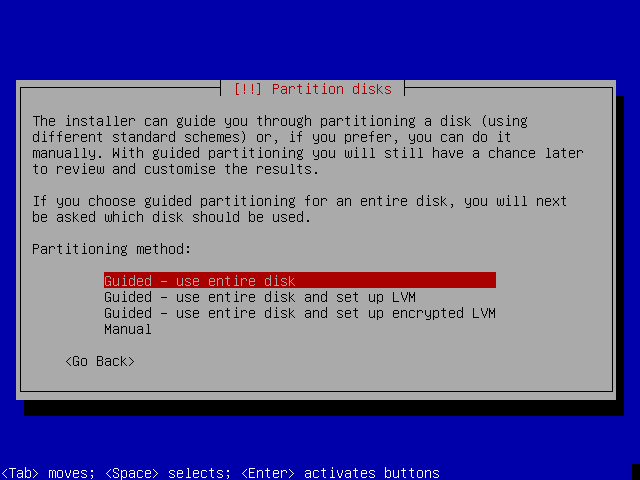
fsmithred wrote:After you configure the clock/timezone, you get the following screen. Choose "Manual".
https://www.devuan.org/os/documentation … disks1.pngHere's the link for that page: https://www.devuan.org/os/documentation … all-devuan
Oh men! The problem is almost sitting in front of the system. :0
But now I tried the manual configuration. When I choose "USE ALL SPACE IN ONE PARTITION"
- Nevertheless a SWAP will be created.
- And Installation will not continue until I accept the SWAP partition.I can not find a way to continue without swap partition.
Hi Sailor17,
Choose a manual partitioning in debian-installer and ignore the alert message appearing if you have not selected any partitions for use as swap space. Say you don't want to return to the partitioning menu:
https://www.gnuinos.org/ceres/screensho … -12-29.png
I've just uploaded the sequence of screenshots detailing each step during the installation process. Hope they help you:
https://www.gnuinos.org/ceres/screenshots/
The iso image used above is an unofficial image of devuan ceres:
https://www.gnuinos.org/ceres/
It has been built only for testing purposes during our development of the live-sdk. The username and password for live sessions are user and live, respectively.
Another clarification: select the text mode of debian-installer because the version of main-menu.udeb from chimaera/ceres may fail in graphical mode.
Note: Don't use any of the images of gnuinos beowulf because they won't work properly in your virtual machine, since they are VDEV experiments.
#237 Re: Other Issues » How to get rid of Swap file during installation... » 2021-04-15 23:13:50
aitor wrote:Did you try replacing its <options> from defaults or sw to noauto instead of commenting out the line in /etc/fstab? For example:
# mount -aUnfortunately not because my system crashed totally following the steps from the other post.
Please, in quoting the answer of another member of the forum try to keep the content of the frame in coherence. Thanks.
#238 Re: Other Issues » How to get rid of Swap file during installation... » 2021-04-15 20:06:31
Also commenting out the SWAP part in FSTAB didn't help.
Did you try replacing its <options> from defaults or sw to noauto instead of commenting out the line in /etc/fstab? For example:
# <file system> <mount point> <type> <options> <dump> <pass>
UUID=17dcf181-b71d-4f1c-918d-2d3fff480d85 none swap noauto 0 0
With noauto, the device can be only mounted explicitly.
Reload fstab:
# mount -a#239 Re: Documentation » HOWTO: upgrade Devuan (stable) to the latest Linux kernel » 2021-04-14 19:49:50
Does anyone managed to compile a version 5.X Kernel in Devuan?
Yes, compiled linux-libre-5.9.9 some time ago:
http://packages.gnuinos.org/gnuinos/pool/main/l/linux/
Unfortunately I struggled in configuration using nconfig with error message:
/bin/sh: 1: flex: not found. See below.root@devuan:/usr/src/linux-5.10.30# make nconfig
UPD scripts/kconfig/nconf-cfg
HOSTCC scripts/kconfig/nconf.o
HOSTCC scripts/kconfig/nconf.gui.o
HOSTCC scripts/kconfig/confdata.o
HOSTCC scripts/kconfig/expr.o
LEX scripts/kconfig/lexer.lex.c
/bin/sh: 1: flex: not found
make[1]: *** [scripts/Makefile.host:9: scripts/kconfig/lexer.lex.c] Fehler 127
make: *** [Makefile:603: nconfig] Fehler 2
root@devuan:/usr/src/linux-5.10.30#Any help is appreciated.
This is also an important step for me to learn compile Kernel and Programs, because I'm not willing to use the monstrous systemd distributions and like to contribute in development with Devuan. My be we start to continue this documentation with Major Kernel Updates.
Best regards Hans
That's right, you need to install both flex and bison. But..., what's the problem installing flex?
#240 Re: Forum Feedback » New member SPOCK » 2021-04-05 20:01:03
welcome to d1g!
#241 Re: Devuan Derivatives » Announcing JWM Kit Live [updated iso download] » 2021-01-10 21:42:10
I do know that I have lots of improvements planned for the kit. I now have a much brighter vision of what JWM Kit should be. Lots of changes to come and it will be good.
Keep up the good work!
#242 Re: Desktop and Multimedia » PulseAudio always resets to mute » 2020-12-19 01:16:48
The file /etc/pulse/client.conf.d/00-disable-autospawn.conf is not part of the deb package, it's generated by pulseaudio, and even by uncommenting or set to true autospawn, I experienced the same problems.
The file /etc/pulse/client.conf.d/00-disable-autospawn.conf is inherit to the package. Uncompress the debian folder and you'll find it there.
#243 Re: Other Issues » gnome compile issue » 2020-12-08 20:57:00
also, this is unrelated but while chrooting into debian, I noticed package init now depends on systemd-sysv | sysvinit-core? where did runit-init go?
init, sysvinit and sysvinit-core will be removed from de system; however, sysvinit-utils and init-system-helpers will remain together with some new packages like runit, runit-init and getty-run.
#244 Re: DIY » Make Devuan Ceres ISO » 2020-11-23 07:29:51
Done:
https://www.gnuinos.org/Devuan%20Drafts/
The image contains three extra packages non existent in devuan:
libnetaid: shared library for simple-netaid
snetaid: daemon for simple-netaid
simple-netaid-cdk: ncurses interface for simple-netaid
One clarification: shortly simple-netaid will be compatible with both ifupdown and ifupdown2 (an alternative for ifupdown written in python and including some additional features), but it breaks with ifupdown2 so far because, even being their commands very similar, some arguments differ from eachother. In the case of simple-netaid, this breaking is due to the differences between the arguments used for the ifquery command.
The desktop environment is xfce, and you don't need any password during live sessions.
#245 Re: DIY » Make Devuan Ceres ISO » 2020-11-21 11:53:06
I use currently Devuan Ceres.
But I dont known how to create an ISO system.
Any documentation? suggestion?
I build all the images of gnuinos using the live-sdk. But why Ceres and not Chimaera? Ok... One could say that unstable branch is less subject to change compared to testing. Anyway, the point is that I compile both debian-installer and syslinux from source and It would seem, though, that they need some workaround in chimaera/ceres. For instance, in chimaera syslinux requires a patch pulled from ceres in order to build with gcc-10:
https://bugs.debian.org/cgi-bin/bugrepo … bug=957858
not to mention some missing builddeps like python-is-python2 | python-is-python3.
But still, if people are willing to get images of Ceres, I can build them continuing on the subject of the mailing list I opened time ago, and named "Devuan Drafts" (or something similar?)
#246 Re: Devuan » Archiving Devuan repositories » 2020-10-25 11:47:42
Now I have made following new config for aptly which includes all components by default without specifying them explicitly :
#aptly mirror show devuan-ascii

Name: devuan-ascii
Archive Root URL: https://pkgmaster.devuan.org/merged/
Distribution: ascii
Components: main, contrib, non-free, raspi, beaglebone, droid4, n900, n950, n9, sunxi, exynos
Architectures: i386, amd64, armhf
Download Sources: yes
Download .udebs: no
Last update: never

Information from release file:
Architectures: amd64 arm64 armel armhf i386 ppc64el
Codename: ascii
Components: main contrib non-free raspi beaglebone droid4 n900 n950 n9 sunxi exynos
Date: Fri, 23 Oct 2020 03:30:13 UTC
Label: Devuan
Origin: Devuan
Suite: oldstable
Valid-Until: Fri, 30 Oct 2020 03:27:17 UTC
Version: 2.1
Raspi, Beaglebone, Sunxi (Allwinner) and so on... aren't Components, but low-power computers with ARM processors, each of them using its own linux kernel flavor. Am i wrong at this point?
On the other hand, isn't the config file of aptly defined in JSON format?
#247 Re: Devuan » Archiving Devuan repositories » 2020-10-22 12:21:10
If you don't specify -force-architectures, then aptly will treat Multi-Arch packages including them in both devuan-i386-ascii and devuan-amd64-ascii at the same time, I guess. The following should work:
aptly -force-architectures -architectures="all" mirror create devuan-all-ascii https://archive.devuan.org/merged/ ascii main
aptly mirror update devuan-all-ascii#248 Re: Devuan » Archiving Devuan repositories » 2020-10-20 23:40:55
I think this is a howto for setting up amprolla locally. It's in Spanish. I know for a fact that aitor is running amprolla to merge his own packages in gnuinos.
https://dev1galaxy.org/viewtopic.php?id=2405HTH
This howto needs an update.
#249 Re: Devuan Derivatives » GNUinOS - Libre » 2020-10-20 23:39:20
Is it using both runit and runit-init?
I love that combo and am using it on my x230 thinkpad, and yes it is faster than openrc.
It does use both runit and runit-init, but most of the services are still managed in the classic way.
I would love to see Gnuinos be like a deblobbed devuan like trisquel is for ubuntu, only ten thousand fold better. trisquel still has a lot of freedom issues, rust, java and redhat's bs services.
Yes, the freedom flaws related with rust and cargo due to IceCat, as you know from the Hyperbola forum.
#250 Re: Devuan Derivatives » Build EL Distro based on Devuan, Help! » 2020-10-20 23:25:05
I recently pushed the code of the live-sdk used for the builds of gnuinos to git:
https://gitea.devuan.dev/aitor_czr/live-sdk/
I added some dialogs in order to do the Simple Distro Kit more user-friendly, but i'm still working on the README.md file.
As a quick start:
1) Clone the git repository:
$ git clone https://git.devuan.org/aitor_czr/live-sdk.git2) Install the build dependencies:
# apt-get install zsh cgpt xz-utils gzip schroot debootstrap curl rsync squashfs-tools sudo debmirror \
reprepro wget xorriso isolinux rpl dialog sed cpio syslinux grub-efi-amd64-bin grub-efi-ia32-bin
3) Go to the parent directory and run (as root):
$ cd live-sdk
$ sudo su
# zsh -f
# source sdk
# load
Now, some dialogs will ask you for your needs. In order to avoid issues related with the already existent blends and possible missing packages, choose the following options for your first attempt:
Operating system: Gnuinos
Blend: gnuinos-ob/gnuinos-ob.blend (or whatever you want)
Release: stable
Sections: main
Architecture: i386
Flavor: 686
4) At this point you can build the system by running:
# build_iso_distBut i recommend you to use the mainmenu dialog instead:
# mainmenuand run each step one by one in the same order they appear (have a look at the image attached in the README.md file):
https://gitea.devuan.dev/aitor_czr/live … inmenu.png
Quote: if you are under x86_64, then you can choose either i386 or amd64 architectures
Hope this helps ![]()
Board footer
