You are not logged in.
- Topics: Active | Unanswered
Pages: 1
#1 2022-04-28 19:52:04
[SOLVED] Simple Netaid
As I announced a few days ago in the mailing list, the new version of simple-netaid relies on the OpenWRT microbus architecture (Ubus):
https://openwrt.org/docs/techref/ubus
Over a period of testing time, I thing the most recent packaging of simple-netaid can be considered stable enough for daily use. Latest packages have been upload to packages.gnuinos.org yesterday night. In this section, I'm going to explain how to install and test them under devuan chimaera.
The following steps have been tested after a fresh install of devuan chimaera xfce. First of all, download and install the GnuPG key of gnuinos:
$ wget http://packages.gnuinos.org/gnuinos/pool/main/g/gnuinos-keyring/gnuinos-keyring_2020.05.03_all.deb
$ sudo dpkg -i gnuinos-keyring_2020.05.03_all.deb
Now you'll be able to add the gnuinos repo temporarily to your system:
$ sudo su
# echo "deb http://packages.gnuinos.org/merged chimaera main" > /etc/apt/sources.list.d/gnuinos.list
# apt-get update
After updating the repository, just install simple-netaid-vte3, and the following dependencies will be installed together with it:
# apt-get install simple-netaid-vte3
Leyendo lista de paquetes... Hecho
Creando árbol de dependencias... Hecho
Leyendo la información de estado... Hecho
Se instalarán los siguientes paquetes adicionales:
  libcdk5nc6 libiw30 libnetaid0 libpstat libubox0 libubus0 runit-helper simple-netaid-cdk snetaid ubus
Se instalarán los siguientes paquetes NUEVOS:
  libcdk5nc6 libiw30 libnetaid0 libpstat libubox0 libubus0 runit-helper simple-netaid-cdk simple-netaid-vte3 snetaid ubus
0 actualizados, 11 nuevos se instalarán, 0 para eliminar y 32 no actualizados.
Se necesita descargar 1.046 kB de archivos.
Se utilizarán 3.941 kB de espacio de disco adicional después de esta operación.
¿Desea continuar? [S/n]
Other runtime dependencies that were already installed after my fresh install of devuan chimaera are:
ifupdown , wpasupplicant , isc-dhcp-client , procps , coreutils
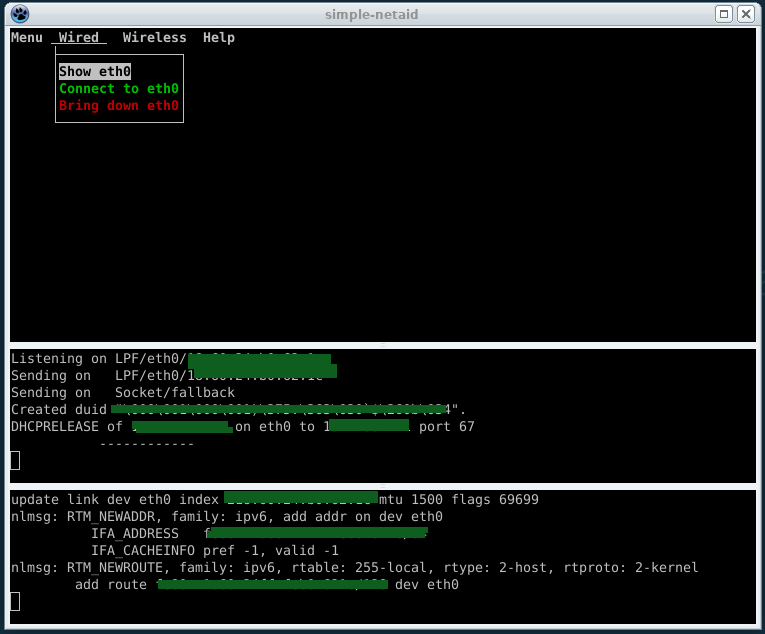
Simple-netaid-vte3 consists of a Gtk container for the ncurses interface of simple-netaid that provides, beyond the systray icon, a paned vte-terminal where both system calls of the ubus service and the info about the routing table netlink events are sent to, as you can see in the image below.
Once simple-netaid has been installed, it's highly recommended to remove network-manager:
# dpkg --purge network-manager-gnome network-managerNow configure the content of /etc/network/interfaces to suite your needs. One sample:
# This file describes the network interfaces available on your system
# and how to activate them. For more information, see interfaces(5).

source /etc/network/interfaces.d/*

# The loopback network interface
auto lo
iface lo inet loopback

auto eth0
allow-hotplug eth0
iface eth0 inet dhcp

allow-hotplug wlan0
iface wlan0 inet dhcp
Reboot the system. If everything goes right, ubus -v list will find out the complete list of procedures and their argument signatures the specific service ering.netaid provides:
$ sudo ubus -v list
[sudo] password for aitor:
'ering.netaid' @2b86f84a
"interface_down":{"id":"Integer","ifname":"String"}
"interface_up":{"id":"Integer","ifname":"String"}
"ifdown":{"id":"Integer","ifname":"String","tty":"Integer"}
"ifup":{"id":"Integer","ifname":"String","tty":"Integer"}
"ipaddr_flush":{"id":"Integer","ifname":"String"}
"wpa_passphrase":{"id":"Integer","essid":"String","passwd":"String","filename":"String"}
"wpa_supplicant":{"id":"Integer","ifname":"String","filename":"String","tty":"Integer"}
"uninstall":{"id":"Integer","filename":"String"}
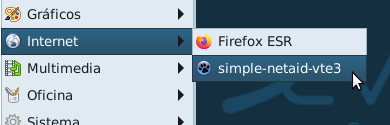
"scan_active_wifis":{"id":"Integer","ifname":"String"}Run simple-netaid from the menu:
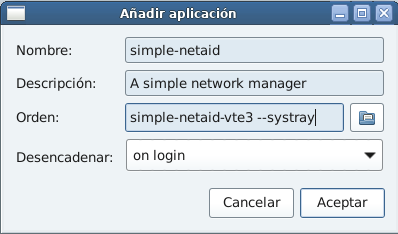
Alternatively, if you want to automatically start simple-netaid when the session is loaded, just specify simple-netaid-vte3 --systray in the dialog displayed via:
Settings Manager -> Session and Startup -> Application Autostart -> Add:
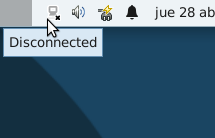
And the application will be iconified in your systray:
The first time you lanch simple-netaid a warning dialog will tell you that you need to be added to the netaid group:
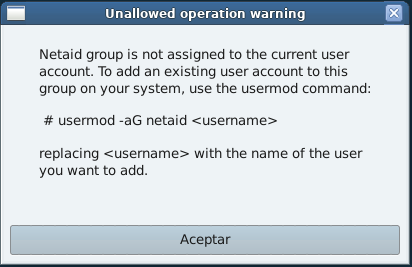
After adding yourself to the netaid group by typing:
# usermod -aG netaid <username>you should be able to call a given procedure within the ering.netaid namespace passing arguments to it as a regular user without granted permissions. For instance (ignore the first argument "id" so far):
$ ubus call ering.netaid ifdown '{ "ifname": "eth0" , "tty": 4 }'will invoke /sbin/ifdown eth0 in the server side, and the system call will be thrown afterwards to the client side as long as the user specifies the current tty passed throughout the last argument signature (i.e. tty). For the sake of the example, we assumed above that
$ tty
/dev/pts/4
In doing so, the root-owned program ifupdown will be executed within the non-privileged console session:
$ ubus call ering.netaid ifdown '{ "ifname": "eth0" , "tty": 4 }'
Killed old client process
Internet Systems Consortium DHCP Client 4.4.1
Copyright 2004-2018 Internet Systems Consortium.
All rights reserved.
For info, please visit https://www.isc.org/software/dhcp/

Listening on LPF/eth0/........ blah blah blah
The ACLs are located in /usr/share/acl.d. Concretly, simple-netaid involves netaid-server.json:
{

   "group": "netaid",

   "access": {

      "ering.netaid": {

          "methods": [
                       "interface_down" ,
                       "interface_up" ,
                       "ifup" ,
                       "ifdown" ,
                       "ipaddr_flush" ,
                       "wpa_passphrase" ,
                       "wpa_supplicant" ,
                       "uninstall" ,
                       "scan_active_wifis"
                     ]
      }

   }

}
This configuration is customizable. For example, it's possible to use something like "user": "devuanita" or even wildcards (*), as explained in the website of the OpenWRT project.
To end with, don't forget to revert the changes in your repository, removing packages.gnuinos.org
It's so risky... ![]()
Therefore, as root:
# dpkg --purge gnuinos-keyring
# rm -f /etc/apt/sources.list.d/gnuinos.list
# apt-get update
Colophon: the automatically connect option of simple-netaid is still a work in progress.
Last edited by aitor (2022-05-02 00:01:40)
If you work systematically, things will come by itself (Lev D. Landau)
Offline
#2 2022-04-29 19:59:09
Re: [SOLVED] Simple Netaid
My wifi connection attempts are failing under 32 bits, and i still don't know why... I wonder if anyone is experiencing something similar
Last edited by aitor (2022-04-29 20:05:28)
If you work systematically, things will come by itself (Lev D. Landau)
Offline
#3 2022-04-30 07:36:15
Re: [SOLVED] Simple Netaid
My wifi connection attempts are failing under 32 bits, and i still don't know why... I wonder if anyone is experiencing something similar
I solved this issue yesterday night. I did a mistake in the format of one of the functions used in policy.c (snetaid) that affected only to 32 bit binaries. I've just uploaded the new packages, and updated the isos as well:
If you work systematically, things will come by itself (Lev D. Landau)
Offline
#4 2022-04-30 16:37:27
Re: [SOLVED] Simple Netaid
I did another important change in the daemon. In relatively old hardware, i noticed a random behavior during the boot process which often crashed upon unsuccesful attempts trying to register the netlink kernel socket. Appearently, the origin of this failure was in the fact that the networking script of ifupdown was still running when snetaid started. The daemon of simple-netaid forks an asynchronous child, resulting on a couple of process IDs: on the one hand the ubus loop waiting for requests in the client side (parent), and the netlink monitor on the other hand (child). I solved the problem above mentioned by adding a routine called wait_on_ifupdown() before trying to bind the netlink socket in the child process.
Let's clarify further that this issue was a side-effect of handling both ifupdown and simple-netaid with runit, and i think that this wouldn't occur in the case of sysvinit. It happened that i migrated the networking script of ifupdown from /etc/init.d/networking to /etc/sv/networking/run and this approach seems to bring a definitive end to the problem of the slow boot waiting for network when the ethernet cable is unpluged, caused by stanzas like auto eth0 and allow-hotplug eth0 in /etc/network/interfaces.
You can verify this fact in the live images of gnuinos chimaera, but i need testers to confirm this point ![]()
Last edited by aitor (2022-04-30 17:28:12)
If you work systematically, things will come by itself (Lev D. Landau)
Offline
#5 2022-04-30 17:22:07
Re: [SOLVED] Simple Netaid
the automatically connect option of simple-netaid is still a work in progress.
To automatically connect eth0 i have both:
auto eth0
allow-hotplug eth0
.......
in my /etc/network/interfaces, and there is no need for ifplugd, no need for netplug. Hence, the automatically connect option of simple-netaid will involve only wireless interfaces.
Last edited by aitor (2022-04-30 17:22:55)
If you work systematically, things will come by itself (Lev D. Landau)
Offline
#6 2022-12-18 02:23:55
Re: [SOLVED] Simple Netaid
Recently i've done several improvements in the sources of simple-netaid and i would like to share with you a brief tutorial explaining how to build it from source. The procedure has been tested in Void Linux and Slackware, but i had trouble running ifupdown in the later. Bear in mind that ifupdown is debian specific, though it's also used in a few independent distributions like Void and Alpine Linux. I still didn't try to build simple-netaid in Alpine, hence i'll specify the build dependencies only for devuan and void.
In de{bi,vu}an you can install them via apt:
# apt-get install git-core build-essential pkg-config autoconf automake libtool intltool libiw-dev libcdk5-dev \
gettext libjson-c-dev libprocps-dev libsigc++-2.0-dev libncurses-dev libvte-2.91-dev libgtk-3-dev
In Void the packages can be installed using the xbps package manager:
# xbps-install git base-devel pkgconf autoconf automake libtool intltool gettext-devel json-c-devel \
procps-ng-devel libsigc++-devel ncurses-devel vte-3-devel gtk+3-devel
Both libiw-dev (i.e. wireless-tools) and cdk5 are missing in the void repo, and we'll need to build them from source. In summary, we're going to build the projects below:
libpstat
libubox
ubus
wireless-tools (only in Void)
libnetaid
snetaid
cdk5 (only in Void)
simple-netaid-cdk
simple-netaid-vte3 (optional)
- Installing LIBPSTAT
Developed by Jude Nelson, libpstat is a small library for getting information on running processes in an OS-agnostic way. The source is available in his git repository, but i added a few extras to suit the needs of simple-netaid. Build it as follows:
$ git clone https://git.devuan.org/aitor_czr/libpstat.git
$ cd libpstat
$ make OS=LINUX
Now install it as root:
# make install PREFIX=/usr/local- Installing LIBUBOX
This consists of a set of utilities, mostly wrappers, that are used by many OpenWrt projects. In this case, it's present in Ubus. The original code (developed by Felix Fietkau) uses the cmake build system, but i replaced it with gnu make:
$ git clone https://git.devuan.org/aitor_czr/libubox.git
$ cd libubox
$ make
As root:
# make install PREFIX=/usr/local- Installing UBUS
Ubus is a system level micro bus architecture basically consistent with DBus. Again, i replaced cmake with the gnu autotools build system (instead of make in this case, because ubus is daemonized and the autotools provide configuration flags suitable for the different scenarios the end user may face depending on the installed init system).
To build the sources you'll have to export the PKG_CONFIG_PATH variable in order to find the libubox library. In Void:
$ export PKG_CONFIG_PATH=${PKG_CONFIG_PATH}:/usr/local/lib/pkgconfigIn devuan:
$ export PKG_CONFIG_PATH=${PKG_CONFIG_PATH}:/usr/local/lib/$(dpkg-architecture -qDEB_HOST_MULTIARCH)/pkgconfigDownload and build the source:
$ git clone https://git.devuan.org/aitor_czr/libubus.git
$ cd libubus
$ autoreconf -i -f
At this point, in devuan with sysvinit run the following command:
$ ./configure --prefix=/usr/local --disable-runit
$ make
In Void with runit:
$ ./configure --prefix=/usr/local --disable-sysvinit
$ make
You can now install ubus:
# make installYou'll face "libtool: warning: remember to run 'libtool --finish /usr/local/lib'" warning because libtool complains that the prefix specified in the during the make phase is different from the one you have when you run make install. But it's a harmless warning and you don't need to do anything.
- Installing WIRELESS-TOOLS (Only in VOID LINUX)
You can download it from the Hewlett Packard repo:
$ git clone https://github.com/HewlettPackard/wireless-tools.git
$ cd wireless-tools/wireless_tools
$ make
As root:
# make install- Installing LIBNETAID
This library consists of some C bindings for the high level ifupdown network manager. Download and build it as follows:
$ git clone https://git.devuan.org/aitor_czr/libnetaid.git
$ cd libnetaid
$ make
As root:
#make install- Installing SNETAID
Configuration daemon for simple-netaid. For the same reason than Ubus, it uses the gnu autotools build system:
$ git clone https://git.devuan.org/aitor_czr/snetaid.git
$ cd snetaid
$ autoreconf -i -f
In devuan with sysvinit:
$ ./configure --prefix=/usr/local --disable-runit
$ make
In Void with runit:
$ ./configure --prefix=/usr/local --disable-sysvinit
$ make
You can now install snetaid:
# make install- Configuring snetaid
Once the installation of snetaid completes, you need to create your user account. First of all create a new group named snetaid and add yourself to the group:
# groupadd netaid
# usermod -aG netaid $USER
Now issue the ldconfig command before starting the installed daemon (in some systems -e.g. Slackware- you may need to add the line /usr/local/lib to your /etc/ld.so.conf):
# ldconfigAfter that, you'll be able to start snetaid. In devuan with sysvinit:
# service snetaid startIn Void with runit:
# sv start snetaidAt this point, i recommend you to reboot the system other than restarting the daemons to ensure that both ubus and snetaid start automatically without issues during the boot process. If everything went as spected, the output of ubus -v list should look similar to this:
$ ubus -v list
'ering.netaid' @0dc00e91
    "interface_down":{"id":"Integer","ifname":"String"}
    "interface_up":{"id":"Integer","ifname":"String"}
    "ifdown":{"id":"Integer","ifname":"String","tty":"Integer"}
    "ifup":{"id":"Integer","ifname":"String","tty":"Integer"}
    "ipaddr_flush":{"id":"Integer","ifname":"String"}
    "wpa_passphrase":{"id":"Integer","essid":"String","passwd":"String","filename":"String"}
    "wpa_supplicant":{"id":"Integer","ifname":"String","filename":"String","tty":"Integer"}
    "uninstall":{"id":"Integer","filename":"String"}
    "scan_active_wifis":{"id":"Integer","ifname":"String"}
- Installing CDK5 (Only in VOID LINUX)
Download the source from debian and build it:
$ git clone https://salsa.debian.org/debian/libcdk5.git
$ cd libcdk5
$ ./configure
$ make
This should go quickly. Once it's built, install it as root:
# make install- Installing SIMPLE-NETAID-CDK
This is a curses interface for simple-netaid. Build it with make:
$ git clone https://git.devuan.org/aitor_czr/simple-netaid-cdk.git
$ cd simple-netaid-cdk
$ make
And install it as root:
# make install PREFIX=/usr/local- Installing SIMPLE-NETAID-VTE3
This is an optional Gtk container for the curses interface of simple-netaid. Build it with make in thje same way as the earlier:
$ git clone https://git.devuan.org/aitor_czr/simple-netaid-vte3.git
$ cd simple-netaid-vte3
$ make
And install it as root:
# make install PREFIX=/usr/localThe launcher should appear in the menu right now.
- Final steps
The last step is to install some runtime dependencies and configure ifupdown. In devuan:
# apt-get install ifupdown wpa-supplicant isc-dhcp-client lsb-baseIn Void:
# xbps-install ifupdown wpa_supplicant dhcpcdVoid Linux uses NetworkManager by default, but it's highly recommended to disable it when using ifupdown. You can type:
# touch /etc/sv/NetworkManager/downto prevent the runit from starting NetworkManager on boot.
Finally, add the following lines to the file /etc/network/interfaces, which has been installed together with ifupdown:
auto lo
iface lo inet loopback

iface <wired_device> inet dhcp
iface <wireless_device> inet dhcpNote: I suggest to by-pass stanzas like auto and allow-hotplug in the configuration of ifupdown, because they may delay the boot process. The master branch of simple netaid will react to the plug-in events of the ethernet cable without the need of any other standalone application like ifplugd or netplug. Therefore, the system will be automatically connected to the network no matter whether or not the cable was plugged in during the boot process, as long as the interface is up when the event occurs.
Last edited by aitor (2022-12-18 14:02:28)
If you work systematically, things will come by itself (Lev D. Landau)
Offline
Pages: 1
